
安全
概述
本文件涵盖了保护开源分发Kapacitor的基础知识。
在寻求保护Kapacitor时,假设Kapacitor服务器将与已经安全的InfluxDB服务器进行通信。它还将使其任务和警报可供Chronograf安装使用。
以下讨论将涵盖配置Kapacitor与安全的InfluxDB服务器进行通信、启用Kapacitor中的TLS以及将启用TLS的Kapacitor服务器连接到Chronograf。
身份验证和授权在开源的Kapacitor发行版中尚未完全实现,但作为Enterprise Kapacitor的一个功能可用。
安全的 InfluxDB 和 Kapacitor
InfluxDB可以通过传输层的TLS和数据库中的身份验证来确保其通信安全。如何在InfluxDB中启用TLS以及身份验证和授权,请参阅InfluxDB文档中的HTTPS设置和身份验证与授权部分。
Kapacitor 配置支持 HTTPS 通信和与 InfluxDB 的身份验证。参数可以直接在配置文件中设置,也可以作为环境变量或通过 Kapacitor 的 HTTP API 设置。
提供了Kapacitor配置的概述,详细内容请参见配置文档。
Kapacitor 和 InfluxDB HTTPS
要激活TLS连接,influxdb服务器配置中的urls字符串需要包含https协议。此外,还需要指定一个PEM编码的公钥和证书对或一个PEM编码的CA文件。
在使用自签名证书进行测试时,同样重要的是通过属性insecure-skip-verify关闭证书验证。否则将会导致 x509 证书错误,如下:
ts=2018-02-19T13:26:11.437+01:00 lvl=error msg="failed to connect to InfluxDB, retrying..." service=influxdb cluster=localhost err="Get https://localhost:8086/ping: x509: certificate is valid for lenovo-TP02, not localhost"
重要 – 请注意,在使用标准CA证书的生产环境中,需要开启 insecure-skip-verify。
在配置文件中,这些值根据以下示例设置。
示例 1 – InfluxDB 的 TLS 配置属性 – kapacitor.conf
[[influxdb]]
  # Connect to an InfluxDB cluster
  # Kapacitor can subscribe, query and write to this cluster.
  # Using InfluxDB is not required and can be disabled.
  enabled = true
  default = true
  name = "localhost"
  urls = ["https://localhost:8086"]
  timeout = 0
  # Absolute path to pem encoded CA file.
  # A CA can be provided without a key/cert pair
  #   ssl-ca = "/etc/ssl/influxdata-selfsigned-incl-pub-key.pem"
  # Absolutes paths to pem encoded key and cert files.
     ssl-cert = "/etc/ssl/influxdb-selfsigned.crt"
     ssl-key = "/etc/ssl/influxdb-selfsigned.key"
...
   insecure-skip-verify = false
...
   subscription-protocol = "https"
...
示例 1 中的相关属性有:
urls– 注意协议是https而不是http。ssl-cert和ssl-key– 指示证书和密钥文件的位置。insecure-skip-verify– 如果使用自签名证书进行测试,将此设置为true,否则应设置为false,尤其是在生产环境中。subscription-protocol– 用于声明订阅通信的正确协议。例如,如果Kapacitor要在HTTP上运行,则应设置为"http",但是如果Kapacitor要在“HTTPS”上运行,则应设置为"https"。
请注意,当 CA 文件同时包含证书和密钥时,可以使用属性 ssl-ca 来替代 ssl-cert 和 ssl-key。
作为环境变量,这些属性可以如下设置:
示例 2 – InfluxDB 的 TLS 配置属性 – ENVARS
KAPACITOR_INFLUXDB_0_URLS_0="https://localhost:8086"
KAPACITOR_INFLUXDB_0_SSL_CERT="/etc/ssl/influxdb-selfsigned.crt"
KAPACITOR_INFLUXDB_0_SSL_KEY="/etc/ssl/influxdb-selfsigned.key"
KAPACITOR_INFLUXDB_0_INSECURE_SKIP_VERIFY=true
KAPACITOR_INFLUXDB_0_SUBSCRIPTION_PROTOCOL="https"
当使用 Systemd 管理 Kapacitor 守护进程时,上述参数可以存储在文件 /etc/default/kapacitor 中。
通过HTTP API将Kapacitor配置为InfluxDB的TLS配置
这些属性也可以使用HTTP API进行设置。要获取当前的
InfluxDB 部分的Kapacitor配置,请使用以下 curl 命令:
curl -ks http://localhost:9092/kapacitor/v1/config/influxdb | python -m json.tool > kapacitor-influxdb.conf
这将导致以下文件:
示例 3 – Kapacitor 配置中的 InfluxDB 部分
{
    "elements": [
        {
            "link": {
                "href": "/kapacitor/v1/config/influxdb/localhost",
                "rel": "self"
            },
            "options": {
                "default": true,
                "disable-subscriptions": false,
                "enabled": true,
                "excluded-subscriptions": {
                    "_kapacitor": [
                        "autogen"
                    ]
                },
                "http-port": 0,
                "insecure-skip-verify": false,
                "kapacitor-hostname": "",
                "name": "localhost",
                "password": true,
                "ssl-ca": "",
                "ssl-cert": "/etc/ssl/influxdb-selfsigned.crt",
                "ssl-key": "/etc/ssl/influxdb-selfsigned.key",
                "startup-timeout": "5m0s",
                "subscription-mode": "cluster",
                "subscription-protocol": "https",
                "subscription-path": "",
                "subscriptions": {},
                "subscriptions-sync-interval": "1m0s",
                "timeout": "0s",
                "udp-bind": "",
                "udp-buffer": 1000,
                "udp-read-buffer": 0,
                "urls": [
                    "https://localhost:8086"
                ],
                "username": "admin"
            },
            "redacted": [
                "password"
            ]
        }
    ],
    "link": {
        "href": "/kapacitor/v1/config/influxdb",
        "rel": "self"
    }
}
通过POST一个包含字段`“set”`的JSON文档,可以更新属性,后面跟着要修改的属性。
例如,以下命令关闭了 insecure-skip-verify 属性。
curl -kv -d '{ "set": { "insecure-skip-verify": false } }' http://localhost:9092/kapacitor/v1/config/influxdb/
...
upload completely sent off: 43 out of 43 bytes
< HTTP/1.1 204 No Content
< Content-Type: application/json; charset=utf-8
< Request-Id: 189e9abb-157b-11e8-866a-000000000000
< X-Kapacitor-Version: 1.7.6~n201802140813
< Date: Mon, 19 Feb 2018 13:45:07 GMT
<
* Connection #0 to host localhost left intact
类似的命令:
要更改URL:
curl -kv -d '{ "set": { "urls": [ "https://lenovo-TP02:8086" ]} }' https://localhost:9092/kapacitor/v1/config/influxdb/要设置
subscription-protocol:curl -kv -d '{ "set": { "subscription-protocol": "https" } }' https://localhost:9092/kapacitor/v1/config/influxdb/如果 Kapacitor 位于反向代理后,请将
subscription-path设置为附加到 InfluxDB 订阅 URL:curl -kv -d '{ "set": { "subscription-path": "/path/behind/reverse-proxy" } }' https://localhost:9092/kapacitor/v1/config/influxdb/设置CA证书的路径:
curl -kv -d '{ "set": { "ssl-ca": "/etc/ssl/influxdata-selfsigned-incl-pub-key.pem" } }' https://localhost:9092/kapacitor/v1/config/influxdb/
其他属性可以以类似的方式设置。
Kapacitor 和 InfluxDB 认证
InfluxDB中可用的另一个安全机制是身份验证和授权。Kapacitor可以配置为使用用户名:密码对与InfluxDB进行通信。这些属性可以在配置文件中、作为环境变量或通过HTTP API进行设置。
示例 4 – InfluxDB 身份验证参数 – kapacitor.conf
[[influxdb]]
  # Connect to an InfluxDB cluster
  # Kapacitor can subscribe, query and write to this cluster.
  # Using InfluxDB is not required and can be disabled.
  enabled = true
  default = true
  name = "localhost"
  urls = ["https://localhost:8086"]
  username = "admin"
  password = "changeit"
  timeout = 0
...
示例 4 中相关的参数是 username 和 password。
这些也可以设置为环境变量。
示例 5 – InfluxDB 认证参数 – ENVARS
KAPACITOR_INFLUXDB_0_USERNAME="admin"
KAPACITOR_INFLUXDB_0_PASSWORD="changeit"
当使用Systemd管理Kapacitor守护程序时,以上参数可以存储在文件 /etc/defaults/kapacitor 中。
另外,它们可以通过HTTP API进行设置或更新。
$ curl -kv -d '{ "set": { "username": "foo", "password": "bar" } }' https://localhost:9092/kapacitor/v1/config/influxdb/
Kapacitor 安全性
开源的Kapacitor提供TLS以加密与HTTP API的通信。
通过TLS的Kapacitor
此功能可以在配置 http 组中启用。要激活,只需将属性 https-enabled 设置为 true,然后提供证书的路径与属性 https-certificate。如果您的证书的私钥是分开的,请使用 https-private-key 属性指定私钥的路径。
以下示例显示了如何在 kapacitor.conf 文件中完成此操作。
示例 6 – 在 kapacitor.conf 中启用 TLS
[http]
  # HTTP API Server for Kapacitor
  # This server is always on,
  # it serves both as a write endpoint
  # and as the API endpoint for all other
  # Kapacitor calls.
  bind-address = ":9092"
  log-enabled = true
  write-tracing = false
  pprof-enabled = false
  https-enabled = true
  https-certificate = "/etc/ssl/influxdata-selfsigned.crt"
  https-private-key = "/etc/ssl/influxdata-selfsigned.key"
这些值也可以设置为环境变量,如下例所示。
示例 7 – 将 TLS 启用为环境变量
KAPACITOR_HTTP_HTTPS_ENABLED=true
KAPACITOR_HTTP_HTTPS_CERTIFICATE="/etc/ssl/influxdata-selfsigned.crt"
KAPACITOR_HTTP_HTTPS_PRIVATE_KEY="/etc/ssl/influxdata-selfsigned.key"
然而,它们 无法 通过HTTP API进行设置。
请记住,当Kapacitor在HTTPS上运行时,这需要在Kapacitor配置的[[influxdb]]组的subscription-protocol属性中反映出来。请参见上面的示例1。这个属性的值需要设置为https。如果不这样做,将导致Kapacitor日志中出现TLS handshake error,错误信息为oversized record received with length 21536:
ts=2018-02-19T13:23:49.684+01:00 lvl=error msg="2018/02/19 13:23:49 http: TLS handshake error from 127.0.0.1:49946: tls: oversized record received with length 21536\n" service=http service=httpd_server_errors
如果由于任何原因关闭了TLS,则需要将此属性重置为 http。不这样做将导致InfluxDB无法将订阅的数据推送到Kapacitor,并在InfluxDB日志中出现如下消息:
mar 05 17:02:40 algonquin influxd[32520]: [I] 2018-03-05T16:02:40Z Post https://localhost:9092/write?consistency=&db=telegraf&precision=ns&rp=autogen: http: server gave HTTP response to HTTPS client service=subscriber
带有HTTPS的Kapacitor命令行客户端
一旦启用了HTTPS,Kapacitor命令行客户端将需要提供-url参数以进行连接。如果使用的是自签名证书或其他未添加到系统证书存储的证书,还需要提供额外参数-skipVerify。
$ kapacitor -url https://localhost:9092 -skipVerify list tasks
ID                                                 Type      Status    Executing Databases and Retention Policies
chronograf-v1-3586109e-8b7d-437a-80eb-a9c50d00ad53 stream    enabled   true      ["telegraf"."autogen"]
Kapacitor 认证和授权
要确保Kapacitor连接时需要用户名和密码,请启用基本身份验证。
要做到这一点,设置username、password和auth-enabled
参数在[http]部分的kapacitor.conf中。
Kapacitor 还支持使用 InfluxDB Enterprise 来管理与 Kapacitor API 的交互的身份验证和授权。有关说明,请参阅 “设置 InfluxDB Enterprise 授权”。
关于HTTP API配置和重启Kapacitor的注意事项
请注意,当使用HTTP API设置配置值时,这些值将在Kapacitor数据库中持久保存,即使在重启后也是如此。要在重启时关闭这些覆盖,可以在配置文件(kapacitor.conf)中或作为环境变量(KAPACITOR_SKIP_CONFIG_OVERRIDES)将属性skip-config-overrides设置为true。
在重启后排查连接问题时,请检查 HTTP API,例如在 http://localhost:9092/kapacitor/v1/config。如果 Kapacitor 与 InfluxDB 之间的通信似乎没有遵循在文件 kapacitor.conf 或环境变量中看到的值,这尤其有用。
拒绝特定的CIDR范围
要拒绝来自某些 CIDR 范围(IP 地址的类别)的 Kapacitor 访问,请使用 -blacklist-cidrs 标志。对于大多数 HTTP GET/POST 操作,传递一个以逗号分隔的 CIDR 列表以拒绝访问:
kapacitord -blacklist-cidrs 10.0.0.0/8,0.0.0.0/32
禁用特定的警报处理程序
使用 -disable-handlers 标志来禁用一组警报处理程序。传递一个以逗号分隔的 handlers 列表:
kapacitord -disable-handlers exec,httppost
保护 Kapacitor 和 Chronograf
对于启用HTTPS/TLS的Kapacitor,许多用户会希望将Kapacitor添加到他们在Chronograf中的连接配置中。要使其正常工作,主要要求是在运行Chronograf服务的主机上安装基本签名证书。对于大多数操作系统,这应该已经是这样。
在使用自签名证书时,这意味着将自签名证书安装到系统中。
在Debian上安装自签名证书
作为在系统上安装自签名证书的示例,在Debian/Ubuntu中,任何证书可以复制到目录/usr/local/share/ca-certificates/,然后可以重建证书存储。
$ sudo cp /etc/ssl/influxdb-selfsigned.crt /usr/local/share/ca-certificates/
$ sudo update-ca-certificates
Updating certificates in /etc/ssl/certs...
1 added, 0 removed; done.
Running hooks in /etc/ca-certificates/update.d...

Replacing debian:influxdb-selfsigned.pem
done.
done.
如果系统中添加了自签名或其他证书,则需要重新启动Chronograf服务以获取新的证书信息。
$ sudo systemctl restart chronograf.service
在Chronograf中添加Kapacitor连接
以下说明适用于Chronograf用户界面。如果Chronograf已安装,默认情况下可以在8888端口找到它(例如:http://localhost:8888)。
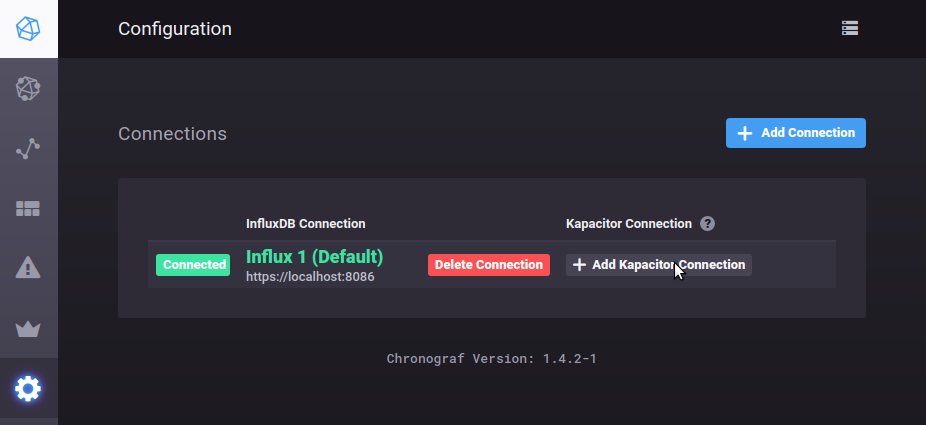
- 在左侧导航栏中打开配置页面。 这将显示所有可用的InfluxDB连接。在包含要添加Kapacitor连接的InfluxDB连接的行中,点击链接添加Kapacitor连接。这将加载添加新的Kapacitor连接页面。
图像 1 – 添加一个 Kapacitor 连接
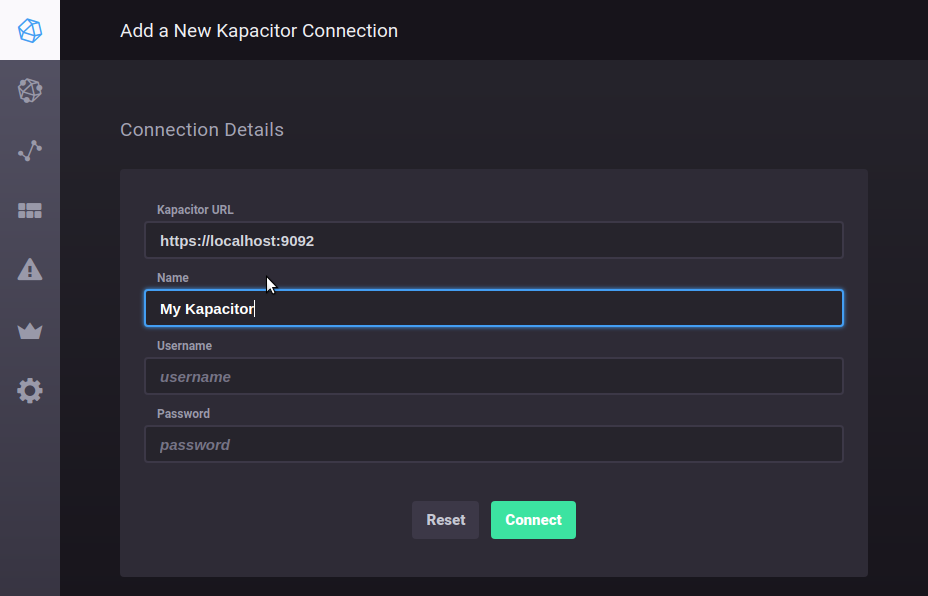
- 在连接详情组中填写连接名称等详细信息,然后点击连接按钮。
图像 2 – Kapacitor 连接详情
- 如果证书已安装在系统上,将会出现成功通知。
图像 3 – Kapacitor 连接成功

如果返回错误通知,请检查Chronograf日志以查找代理错误。 例如:
mar 06 13:53:07 lenovo-tp02 chronograf[12079]: 2018/03/06 13:53:07 http: proxy error: x509: certificate is valid for locahlost, not localhost
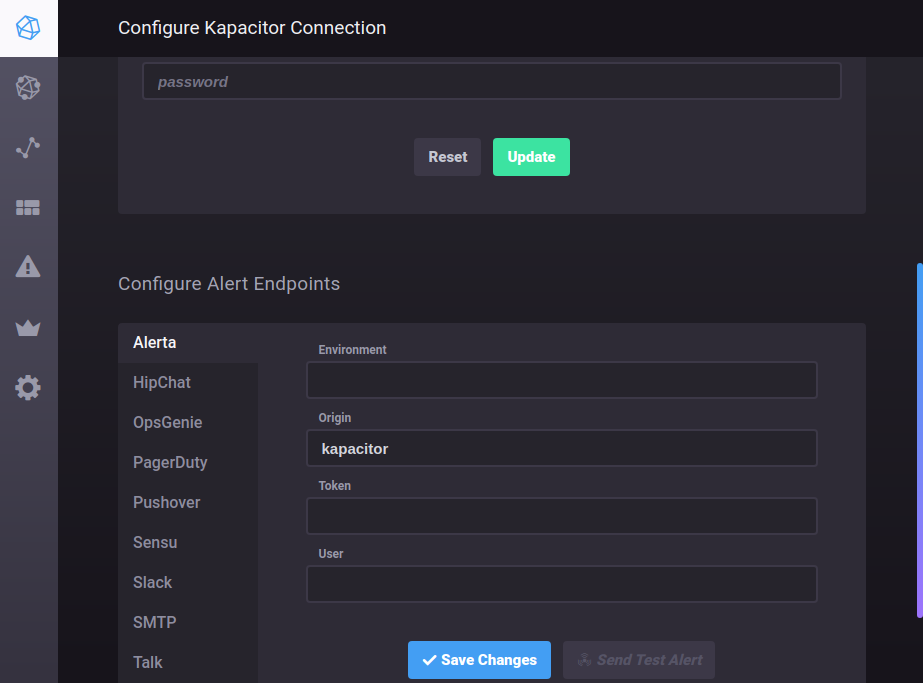
- 同时,编辑和添加Kapacitor Handler端点的标签表单将出现。在更宽的屏幕上,它们将在连接详细信息组的右侧。在更窄的屏幕上,它们将在连接详细信息组的下方。
图像 4 – 配置 Kapacitor 处理程序端点
此时,Kapacitor可以通过Chronograf生成警报和TICK脚本。这些功能可以通过左侧导航栏中的警报项目访问。