Code
library(ggplot2)
dat <- data.frame(cond = rep(c("A", "B"), each=10),
xvar = 1:20 + rnorm(20,sd=3),
yvar = 1:20 + rnorm(20,sd=3))
ggplot(dat, aes(x=xvar, y=yvar)) +
geom_point(shape=1) +
geom_smooth() 
There are wide variety of options available to customize the display of source code within HTML documents, including:
Details on using all of these options are provided below.
For many documents you may want to hide all of the executable source code used to produce dynamic outputs. You can do this by specifying echo: false in the document execute options. For example:
Note that we can override this option on a per code-block basis. For example:
Code block options are included in a special comment at the top of the block (lines at the top prefaced with #| are considered options).
Use the code-fold option to include code but have it hidden by default using the HTML <details> tag. For example, click the Code button to see the code that produced this plot.

Here we specify both code-fold: true as well as custom summary text (the default is just “Code” as shown above):
Valid values for code-fold include:
| Value | Behavior |
|---|---|
false |
No folding (default) |
true |
Fold code (initially hidden) |
show |
Fold code (initially shown) |
Use the code-fold and code-summary chunk attributes to control this on a chunk-by-chunk basis:
In some cases the width of source code will overflow the available horizontal display space. By default, this will result in a horizontal scroll bar for the code block. However if you prefer not to have scrollbars you can have the longer lines wrap instead.
To set the global default behavior use the code-overflow option. For example:
Valid values for code-overflow are:
| Option | Description |
|---|---|
scroll |
Scroll code blocks that exceed available width (default, corresponds to white-space: pre). |
wrap |
Wrap lines of code that exceed available width (corresponds to white-space: pre-wrap). |
You can also override the global default on a per-code-block basis. For computational cells you do this with the code-overflow cell option:
For a static code block, add the .code-overflow-scroll or .code-overflow-wrap CSS class:
Note that irrespective of these options, code will always wrap within printed HTML output (as it would otherwise be clipped off the edge of the page).
You can include a Code menu in the header of your document that provides various tools for readers to interact with the source code. Specify code-tools: true to activate these tools:
If you have a document that includes folded code blocks then the Code menu will present options to show and hide the folded code as well as view the full source code of the document:

This document specifies code-tools: true in its options so you should see the Code menu above next to the main header.
You can control which of these options are made available as well as the “Code” caption text using sub-options of code-tools. For example, here we specify that we want only “View Source” (no toggling of code visibility) and no caption on the code menu:
By default, the source code is embedded in the document and shown in a popup window like this:
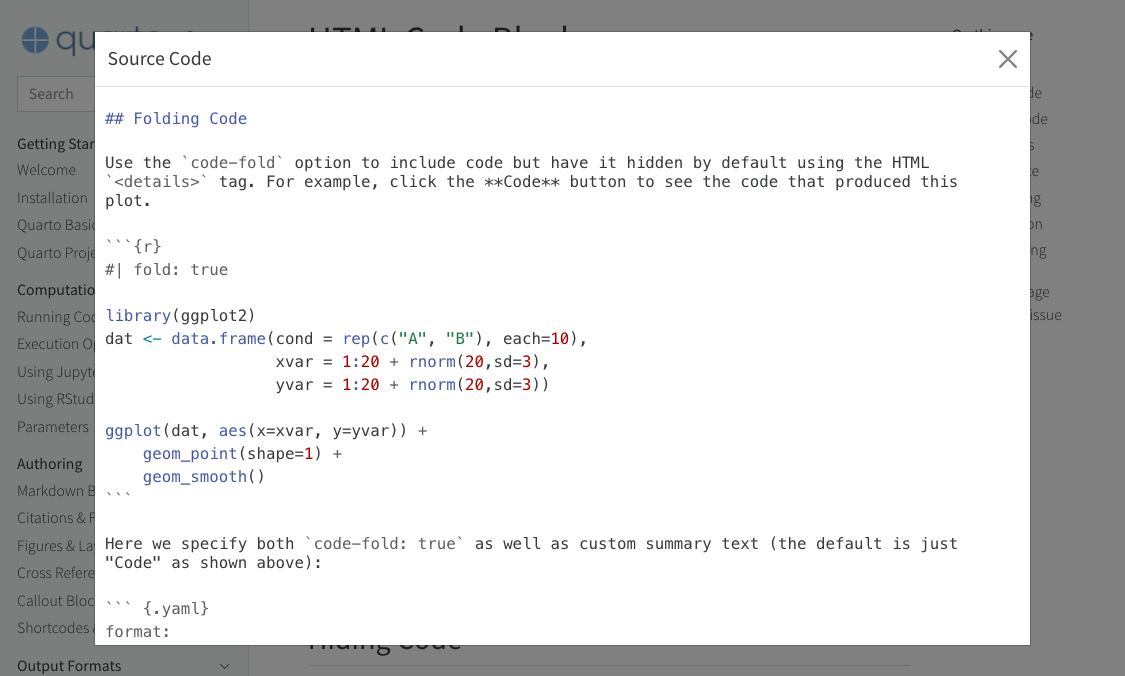
You can alternatively specify a URL for the value of source:
If you are within a project and have specified a repo-url option then you can just use repo and the correct link to your source file will be generated:
Note that the code-tools option is not available when you disable the standard HTML theme (e.g. if you specify the theme: none option).
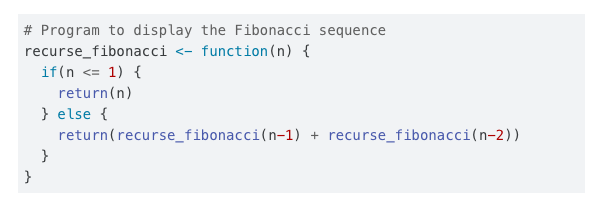
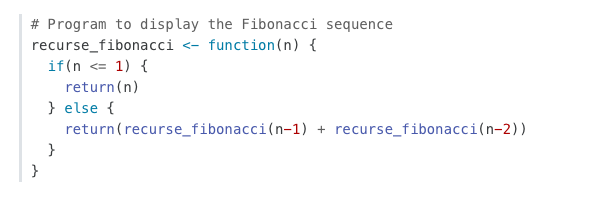
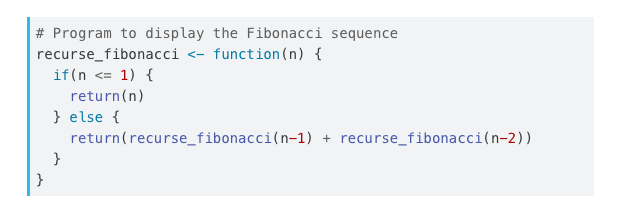
By default code blocks are rendered with a left border whose color is derived from the current theme. You can customize code chunk appearance with some simple options that control the background color and left border. Options can either be booleans to enable or disable the treatment or can be legal CSS color strings (or they could even be SASS variable names!).
Here is the default appearance for code blocks (code-block-background: true):
You can instead use a left border treatment using the code-block-border-left option:
You can combine a background and border treatment as well as customize the left border color:
Use the filename attribute on code blocks If you are documenting the contents of a file and want to be especially clear about the name of the file the code is associated with.
For example, the following code:
```{.python filename="matplotlib.py"}
import matplotlib.pyplot as plt
plt.plot([1,23,2,4])
plt.show()
```Results in this HTML output:

Non-HTML formats will still have the filename, but it will simply be shown in bold above the code block.
Pandoc will automatically highlight syntax in fenced code blocks that are marked with a language name. For example:
```python
1 + 1
```Pandoc can provide syntax highlighting for over 140 different languages (see the output of quarto pandoc --list-highlight-languages for a list of all of them). If you want to provide the appearance of a highlighted code block for a language not supported, just use default as the language name.
You can specify the code highlighting style using highlight-style and specifying one of the supported themes. These themes are “adaptive”, which means they will automatically switch between a dark and light mode based upon the theme of the website. These are designed to work well with sites that include a dark and light mode.
All of the standard Pandoc themes are also available:
As well as an additional set of extended themes, including:
The highlight-style option determines which theme is used. For example:
Highlighting themes can provide either a single highlighting definition or two definitions, one optimized for a light colored background and another optimized for a dark color background. When available, Quarto will automatically select the appropriate style based upon the code chunk background color’s darkness. Users may always opt to specify the full name (e.g. atom-one-dark) to by pass this automatic behavior.
By default, code is highlighted using the arrow theme, which is optimized for accessibility. We’ve additionally introduced the arrow-dark theme which is designed to provide accessible highlighting against dark backgrounds.
Examples of the light and dark themes:


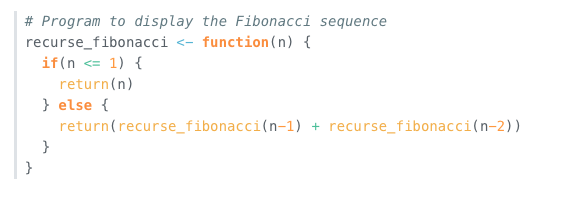
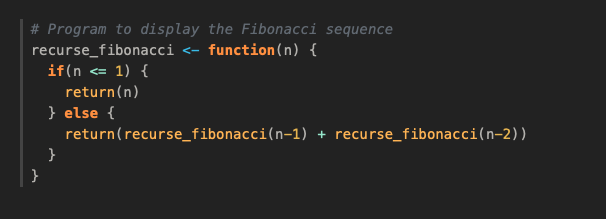
In addition to the built in themes available for syntax highlighting, you can also specify your own syntax highlighting by providing the path to a valid theme file (which is based upon the KDE XML syntax highlighting descriptions). Highlighting is implemented using skylighting.
For example:
In addition, if you’d like to provide adaptive themes, you may also pass both a light and dark theme file:
Note that as with adaptive text higlighting themes, when you provide a dark and light highlight-style, background colors specified in the themes will be ignored in favor of the overall theme specified background colors.
You can add annotations to lines of code in code blocks and executable code cells. See Code Annotation for full details.
If you want to display line numbers alongside the code block, add the code-line-numbers option. For example:
Here’s how a code block with line numbers would display:
You can also enable line numbers for an individual code block using the code-line-numbers attribute. For example:
The documentation on computations covers how to include executable code blocks (code which is actually executed, with its output being included in the rendered document). We won’t additionally cover that here, but we will talk about how to include code blocks that demonstrate executable syntax (e.g. for writing a tutorial).
Often you’ll want to include a fenced code block purely as documentation (not executable). You can do this by using two curly braces around the language (e.g. python, r, etc.) rather than one. For example:
Will be output into the document as:
If you want to show an example with multiple code blocks and other markdown, just enclose the entire example in 4 backticks (e.g. ````) and use the two curly brace syntax for code blocks within. For example:
Hover over the code block below and you will see a copy icon in the top-right corner:
This behavior is enabled by default but you configure it using the code-copy option:
Valid values for code-copy include:
hover |
Show button on hover (default) |
true |
Always show code copy button |
false |
Never show code copy button |
The code-link option enables hyper-linking of functions within code blocks to their online documentation:
Code linking is currently implemented only for the knitr engine (via the downlit package). A limitation of downlit currently prevents code linking if code-line-numbers and/or code-annotations are also true.
---
title: "HTML代码块"
format:
html:
code-tools: true
execute:
warning: false
---
## 概述
在HTML文档中,有许多选项可以自定义源代码的显示方式,包括:
1. 隐藏由[Knitr](https://yihui.name/knitr)或[Jupyter](https://jupyter.org)执行的部分或全部代码。
2. 对已执行的代码进行代码折叠(默认隐藏,读者可展开)。
3. 处理超出可用水平显示空间的代码。
4. 查看用于生成文档的markdown文件的源代码。
5. 语法高亮主题和其他控制代码外观的选项。
6. 代码块的复制到剪贴板按钮。
7. 通过[downlit](https://downlit.r-lib.org/)包为代码块中使用的函数生成在线文档的超链接(注意,此选项目前仅在使用Knitr引擎时有效)。
下面提供了使用所有这些选项的详细信息。
## 隐藏代码
对于许多文档,您可能希望隐藏用于生成动态输出的所有可执行源代码。您可以通过在文档的`execute`选项中指定`echo: false`来实现这一点。例如:
``` yaml
---
title: "我的文档"
execute:
echo: false
jupyter: python3
---
```
请注意,我们可以在每个代码块的基础上覆盖此选项。例如:
```{python}
#| echo: true

import matplotlib.pyplot as plt
plt.plot([1,2,3,4])
plt.show()
```
代码块选项包含在块顶部的特殊注释中(顶部以`#|`开头的行被视为选项)。
## 折叠代码
使用`code-fold`选项可以包含代码,但默认情况下使用HTML的`<details>`标签隐藏它。例如,点击**代码**按钮查看生成此图的代码。
```{r}
#| code-fold: true
library(ggplot2)
dat <- data.frame(cond = rep(c("A", "B"), each=10),
                  xvar = 1:20 + rnorm(20,sd=3),
                  yvar = 1:20 + rnorm(20,sd=3))

ggplot(dat, aes(x=xvar, y=yvar)) +
  geom_point(shape=1) +
  geom_smooth()
```
在这里,我们同时指定了`code-fold: true`和自定义的摘要文本(默认只是“代码”,如上所示):
``` yaml
format:
html:
code-fold: true
code-summary: "显示代码"
```
`code-fold`的有效值包括:
| 值 | 行为 |
|---------|------------------------------|
| `false` | 无折叠(默认) |
| `true` | 折叠代码(初始隐藏) |
| `show` | 折叠代码(初始显示) |
使用`code-fold`和`code-summary`块属性在块级基础上控制这一点:
```{r}
#| code-fold: true
#| code-summary: "显示代码"
```
## 代码溢出
在某些情况下,源代码的宽度会超出可用的水平显示空间。默认情况下,这会导致代码块出现水平滚动条。然而,如果您不希望有滚动条,您可以让较长的行换行。
要设置全局默认行为,请使用`code-overflow`选项。例如:
``` yaml
format:
  html:
    code-overflow: wrap
```
`code-overflow`的有效值为:
| 选项 | 描述 |
|------------------|------------------------------------------------------|
| `scroll` | 滚动超出可用宽度的代码块(默认,对应于`white-space: pre`)。 |
| `wrap` | 换行超出可用宽度的代码行(对应于`white-space: pre-wrap`)。 |
您还可以在每个代码块的基础上覆盖全局默认值。对于计算单元格,您可以使用`code-overflow`单元格选项来实现这一点:
```{python}
#| code-overflow: wrap
# 非常长的代码行....
```
对于静态代码块,添加`.code-overflow-scroll`或`.code-overflow-wrap` CSS类:
```` python
```{.python .code-overflow-wrap}
# 非常长的代码行....
```
````
请注意,无论这些选项如何,代码在打印的HTML输出中始终会换行(否则会被截断在页面边缘)。
## 代码工具
您可以在文档的标题中包含一个**代码**菜单,为读者提供与源代码交互的各种工具。指定`code-tools: true`以激活这些工具:
``` yaml
format:
  html:
    code-fold: true
    code-tools: true
```
如果您有一个包含折叠代码块的文档,那么**代码**菜单将提供显示和隐藏折叠代码以及查看文档完整源代码的选项:
{.border fig-alt="渲染的Quarto文档标题的屏幕截图,显示了将code-fold和code-tools选项设置为true的结果。页面标题右侧有一个下拉菜单,标签为“代码”,向下指向的三角形。菜单已打开,下方垂直列出了三个选项:“隐藏所有代码”、“显示所有代码”和“查看源代码”。"}
本文档在选项中指定了 `code-tools: true`,因此你应该在主标题旁边看到 **Code** 菜单。
你可以通过 `code-tools` 的子选项来控制这些选项的可用性以及“Code”菜单的标题文本。例如,在这里我们指定我们只想要“查看源代码”(不切换代码可见性),并且代码菜单上没有标题:
``` yaml
format:
  html:
    code-tools:
      source: true
      toggle: false
      caption: none
```
默认情况下,源代码嵌入在文档中,并在弹出窗口中显示,如下所示:
{fig-alt="此网页的屏幕截图,上方有一个标有“源代码”的弹出窗口。这个“源代码”窗口包含用于编写此页面的原始 Markdown 和 R 代码。在“源代码”弹出的右上角有一个“X”来关闭它。"}
你也可以为 `source` 的值指定一个 URL:
``` yaml
format:
  html:
    code-tools:
      source: https://github.com/quarto-dev/quarto-web/blob/main/index.md
```
如果你在一个项目中并且指定了 `repo-url` 选项,那么你可以只使用 `repo`,并生成正确的源文件链接:
``` yaml
format:
  html:
    code-tools:
      source: repo
```
请注意,当你禁用标准 HTML 主题(例如,如果你指定了 `theme: none` 选项)时,`code-tools` 选项不可用。
## 外观
默认情况下,代码块渲染时带有从当前主题派生的颜色的左侧边框。你可以通过一些简单的选项来自定义代码块的外观,这些选项控制背景颜色和左侧边框。选项可以是布尔值以启用或禁用处理,也可以是合法的 CSS 颜色字符串(或者它们甚至可以是 SASS 变量名称!)。
以下是代码块的默认外观(`code-block-background: true`):
{fig-alt="带有灰色背景的代码块。"}
你可以使用 `code-block-border-left` 选项使用左侧边框处理:
``` yaml
code-block-border-left: true
```
{fig-alt="带有灰色垂直条纹沿其左侧边框运行的代码块。此代码块没有背景。"}
你也可以结合背景和边框处理,并自定义左侧边框颜色:
``` yaml
code-block-bg: true
code-block-border-left: "#31BAE9"
```
{fig-alt="带有灰色背景和蓝色垂直条纹沿其左侧边框运行的代码块。"}
## 代码文件名 {#code-filename}
如果你正在记录文件内容,并且想要特别清楚代码所关联的文件名,请在代码块上使用 `filename` 属性。
例如,以下代码:
```` markdown
```{.python filename="matplotlib.py"}
import matplotlib.pyplot as plt
plt.plot([1,23,2,4])
plt.show()
```
````
将生成以下 HTML 输出:

非 HTML 格式仍然会有文件名,但它将简单地以粗体显示在代码块上方。
## 高亮
Pandoc 将自动高亮显示带有语言名称标记的 [fenced code blocks](https://pandoc.org/MANUAL.html#fenced-code-blocks) 中的语法。例如:
```python
1 + 1
```
Pandoc 可以为超过 140 种不同的语言提供语法高亮(参见 `quarto pandoc --list-highlight-languages` 的输出以获取所有语言的列表)。如果你想为不支持的语言提供高亮代码块的外观,只需使用 `default` 作为语言名称。
你可以使用 `highlight-style` 并指定一个支持的主题来指定代码高亮样式。这些主题是“自适应的”,这意味着它们将根据网站的主题自动在暗模式和亮模式之间切换。这些设计用于包含暗模式和亮模式的网站。
- a11y
- arrow
- atom-one
- ayu
- breeze
- github
- gruvbox
所有标准的 Pandoc 主题也可用:
- pygments
- tango
- espresso
- zenburn
- kate
- monochrome
- breezedark
- haddock
以及一组额外的扩展主题,包括:
- dracula
- monokai
- nord
- oblivion
- printing
- radical
- solarized
- vim-dark
`highlight-style` 选项决定使用哪个主题。例如:
``` yaml
highlight-style: github
```
高亮主题可以提供单一的高亮定义或两个定义,一个针对浅色背景优化,另一个针对深色背景优化。当可用时,Quarto 将根据代码块背景颜色的深浅自动选择适当的样式。用户始终可以选择指定完整名称(例如 `atom-one-dark`)来绕过此自动行为。
默认情况下,代码使用 `arrow` 主题进行高亮显示,该主题针对可访问性进行了优化。我们还引入了 `arrow-dark` 主题,该主题旨在在深色背景下提供可访问的高亮显示。
亮色和暗色主题的示例:
#### Arrow (亮色)
{fig.alt="展示 Arrow (亮色) 主题的代码块。"}
#### Arrow (暗色)
{fig.alt="展示 Arrow (暗色) 主题的代码块。"}
#### Ayu (亮色)
{fig.alt="展示 Ayu (亮色) 主题的代码块。"}
#### Ayu (暗色)
{.preview-image fig.alt="展示 Ayu (暗色) 主题的代码块。"}
### 自定义高亮显示
除了内置的语法高亮主题外,您还可以通过提供有效主题文件的路径来指定自己的语法高亮(该文件基于 KDE XML 语法高亮描述)。高亮显示是使用 [skylighting](https://github.com/jgm/skylighting) 实现的。
例如:
``` yaml
---
highlight-style: custom.theme
---
```
此外,如果您想提供自适应主题,您还可以传递亮色和暗色主题文件:
``` yaml
---
highlight-style:
  light: custom-light.theme
  dark: custom-dark.theme
---
```
请注意,与自适应文本高亮主题一样,当您提供暗色和亮色 `highlight-style` 时,主题中指定的背景颜色将被忽略,取而代之的是整体主题指定的背景颜色。
{{< include _code-annotation.md >}}
## 行号 {#line-numbers}
如果您想在代码块旁边显示行号,请添加 `code-line-numbers` 选项。例如:
``` yaml
format:
  html:
    code-line-numbers: true
```
以下是带有行号的代码块的显示方式:
``` {.python code-line-numbers="true"}
import matplotlib.pyplot as plt
plt.plot([1,23,2,4])
plt.show()
```
您还可以使用 `code-line-numbers` 属性为单个代码块启用行号。例如:
```` python
``` {.python code-line-numbers="true"}
import matplotlib.pyplot as plt
plt.plot([1,23,2,4])
plt.show()
```
````
## 可执行代码块
关于 [计算](/docs/get-started/computations/index.qmd) 的文档涵盖了如何包含可执行代码块(实际执行的代码,其输出包含在渲染的文档中)。我们不会在这里额外介绍,但我们会讨论如何包含展示可执行语法的代码块(例如,用于编写教程)。
{{< include ../computations/_unexecuted-blocks.md >}}
## 复制按钮
将鼠标悬停在下面的代码块上,您将在右上角看到一个复制图标:
```{r eval=FALSE}
library(dygraphs)
dygraph(nhtemp, main = "New Haven Temperatures") %>%
  dyRangeSelector(dateWindow = c("1920-01-01", "1960-01-01"))
```
此行为默认启用,但您可以使用 `code-copy` 选项进行配置:
``` yaml
format:
  html:
    code-copy: false
```
`code-copy` 的有效值包括:
| | |
|---------|--------------------------------|
| `hover` | 悬停时显示按钮(默认) |
| `true` | 始终显示代码复制按钮 |
| `false` | 永不显示代码复制按钮 |
## 代码链接
`code-link` 选项启用代码块中函数的超链接,链接到其在线文档:
``` yaml
format:
  html:
    code-link: true
```
代码链接目前仅针对 knitr 引擎实现(通过 [downlit](https://downlit.r-lib.org) 包)。downlit 的当前限制是,如果 `code-line-numbers` 和/或 `code-annotations` 也为 `true`,则无法进行代码链接。