演示幻灯片
概述
本文介绍了使用Reveal演示幻灯片的基本操作。基本的导航通过以下键盘快捷键完成:
| 操作 | 按键 |
|---|---|
| 下一张幻灯片 | → SPACE N |
| 上一张幻灯片 | ← P |
| 无片段导航 | Alt → Alt ← |
| 跳转到第一张/最后一张幻灯片 | Shift → Shift ← |
在演示时,您通常会希望进入全屏模式。您可以通过按F键来实现这一点。
除了基本的键盘导航外,Reveal还支持多种高级功能,包括:
- 导航菜单和概览模式
- 演讲者视图(带有演讲者笔记、计时器以及即将到来的幻灯片预览)
- 打印为PDF并发布为独立的HTML
- 在幻灯片上绘图和黑板/白板模式
- 多路复用,允许您的观众在他们的手机、平板电脑或笔记本电脑上跟随您控制的演示幻灯片。
以下将详细描述这些功能。
导航菜单
Quarto内置了reveal.js-menu插件的版本。您可以使用位于演示文稿左下角的按钮![]() 访问导航菜单。点击该按钮会打开一个幻灯片导航菜单,使您能够轻松跳转到任何幻灯片:
访问导航菜单。点击该按钮会打开一个幻灯片导航菜单,使您能够轻松跳转到任何幻灯片:
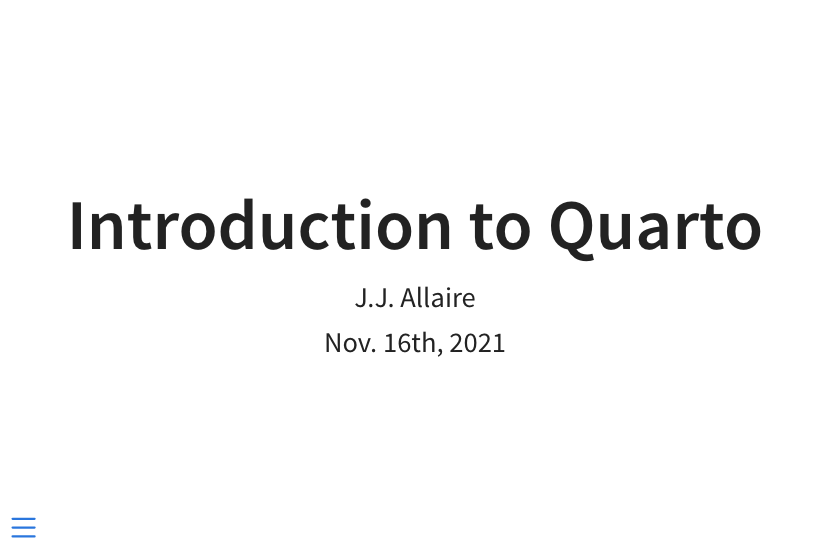
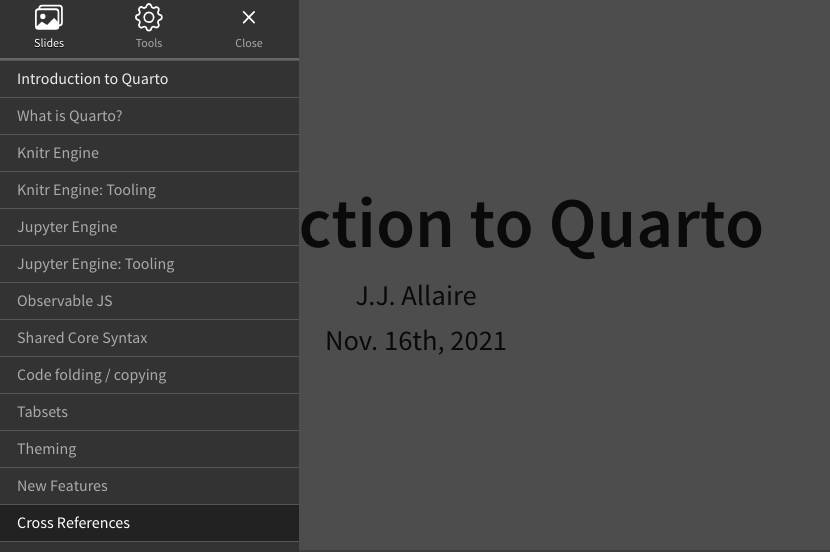
您也可以通过按M键来打开导航菜单。
导航菜单还包括一个工具面板,提供访问其他各种导航工具,包括全屏、演讲者视图、概览模式和打印为PDF。
使用以下选项自定义菜单的外观和行为:
| 选项 | 描述 |
|---|---|
side |
菜单在演示文稿中显示的一侧。left或right(默认值为left)。 |
width |
菜单的宽度(normal、wide、third、half、full,或任何有效的css长度值)。默认值为normal |
numbers |
在菜单项中添加幻灯片编号。 |
例如:
format:
  revealjs:
    menu:
      side: right
width: wide您可以通过指定menu: false选项来隐藏导航菜单:
format:
  revealjs:
menu: false请注意,即使按钮被隐藏,您仍然可以使用M键打开菜单。
概览模式
概览模式提供了一个替代视图,显示每张幻灯片的缩略图:

您可以通过按O键启用概览模式。
幻灯片缩放
按住Alt键(在Linux中为Ctrl)并点击任何元素以放大它。尝试放大以下图像之一:
再次Alt或Ctrl点击以缩小。
演讲者视图
演讲者视图显示当前幻灯片以及即将到来的幻灯片、计时器以及与当前幻灯片相关的任何演讲者笔记:
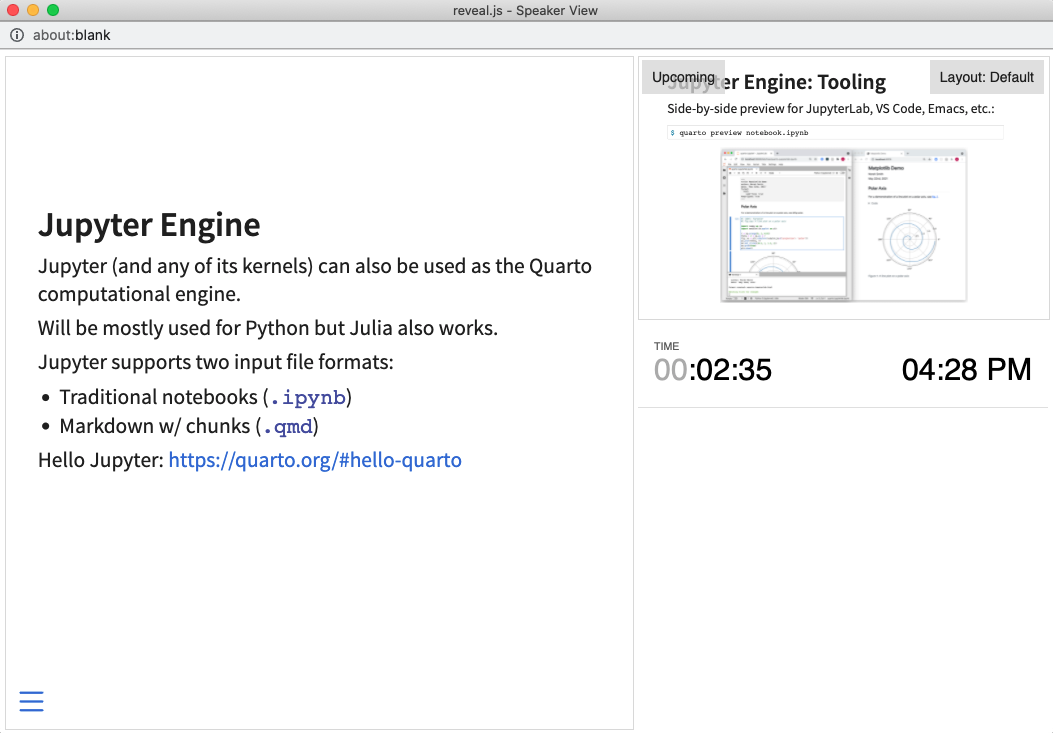
您可以通过按S键启用演讲者视图。
您可以使用带有.notes类的div为幻灯片添加演讲者笔记。例如:
## 带有演讲者笔记的幻灯片

幻灯片内容

::: {.notes}
演讲者笔记放在这里。
:::
可以使用 slide-number 选项为演示文稿添加页码。还可以使用 show-slide-number 选项控制页码在哪些上下文中显示。例如,这里我们只为打印输出配置页码:
---
title: "Presentation"
format:
  revealjs:
    slide-number: true
    show-slide-number: print
---
除了简单的 true 或 false 值外,slide-number 选项还可以指定格式。可用的格式包括:
| 值 | 描述 |
|---|---|
c/t |
幻灯片编号 / 总幻灯片数(默认) |
c |
仅幻灯片编号 |
h/v |
水平 / 垂直幻灯片编号 |
h.v |
水平 . 垂直幻灯片编号 |
有关垂直幻灯片的更多信息,请参见 垂直幻灯片。
show-slide-number 选项支持以下值:
| 值 | 描述 |
|---|---|
all |
在所有上下文中显示页码(默认) |
print |
仅在打印为PDF时显示页码 |
speaker |
仅在演讲者视图中显示页码 |
打印为PDF
Reveal 演示文稿可以通过特殊的打印样式表导出为PDF。
注意:此功能已在 Google Chrome、Chromium 以及 Firefox 中得到确认。
要打印为PDF,请执行以下操作:
- 使用 EE 键(或使用 导航菜单)切换到打印视图。
- 打开浏览器内置的打印对话框 Ctrl+PCtrl+P。
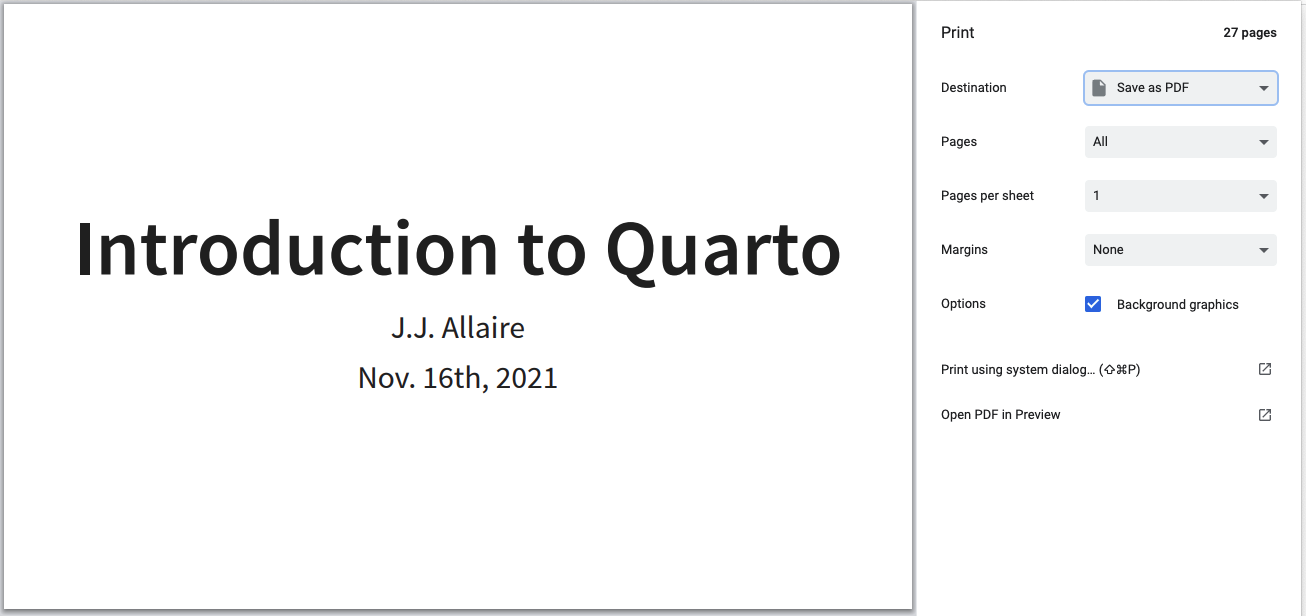
- 将 目标 设置更改为 另存为PDF。
- 将 布局 更改为 横向。
- 将 页边距 更改为 无。
- 启用 背景图形 选项。
- 点击 保存 🎉
如果你在同一窗口中进入打印模式,可以使用相同的 EE 键退出打印视图,或者使用浏览器中的后退按钮返回到最后查看的幻灯片。
以下是启用这些设置时Chrome打印对话框的样子:
打印选项
有一些选项会影响打印输出,你可能希望在打印前进行配置:
| 选项 | 描述 |
|---|---|
show-notes |
包含演讲者笔记(true、false 或 separate-page) |
slide-number |
包含幻灯片编号(true 或 false) |
pdf-max-pages-per-slide |
过高而无法在单页内显示的幻灯片将扩展到多页。你可以使用 pdf-max-pages-per-slide 选项限制幻灯片扩展的页数。 |
pdf-separate-fragments |
默认情况下,包含多个片段的幻灯片打印在单页上。要为每个片段创建一页,请将此选项设置为 true。 |
例如,以下内容指定我们希望在单独的页面上打印演讲者笔记并包含幻灯片编号:
---
title: "Presentation"
format:
  revealjs:
    show-notes: separate-page
    slide-number: true
---
预览链接
Reveal 使得通过 preview-links 选项轻松地将导航到外部网站的功能融入演示流程。
当你点击带有 preview-links: true 的超链接时,链接将在覆盖幻灯片的 iframe 中导航。例如,这里我们点击了一个 Matplotlib 链接,网站在幻灯片上方打开(你需要点击右上角的关闭按钮来隐藏它):

preview-link 可用的值包括:
| 值 | 描述 |
|---|---|
true |
启用链接预览功能 |
false |
禁用链接预览功能(默认) |
auto |
在全屏演示模式下预览链接(否则正常导航) |
true |
始终预览链接 |
false |
永不预览链接(默认) |
例如,这里我们将 preview-links 设置为 auto:
---
title: "演示"
format:
  revealjs:
    preview-links: auto
---
你也可以在每个链接的基础上设置此选项。这两个链接分别启用了和禁用了预览:
[预览](https://example.com){preview-link="true"}

[无预览](https://example.com){preview-link="false"}
在 HTML 格式中预览网站将使用 <iframe>,并非所有网站都允许(例如,它们可以在响应头中设置 X-Frame-Options 为 deny,或者在 Content-Security-Policy 中设置 frame-ancestor 限制)。如果一个网站不允许使用 iframe,则在 Quarto 文档输出中预览将无法工作。
幻灯片音调
当你切换幻灯片时,幻灯片音调会播放微妙的声音。这是由一位盲人用户提出的,使演示者能够听到他们通过幻灯片进度的听觉信号。通过以下方式启用幻灯片音调:
format:
  revealjs:
    slide-tone: true
音调从低 C 音到高 C 音逐个幻灯片增加。对于增量幻灯片,音调保持不变。
幻灯片音调的实现改编自 xaringanExtra 中的幻灯片音调插件。
自动幻灯片
演示文稿可以配置为在没有用户输入的情况下自动逐个幻灯片进行。要启用此功能,你需要使用 auto-slide 选项指定幻灯片更改的时间间隔(间隔以毫秒为单位)。还可以指定 loop 选项,以在显示所有幻灯片后继续循环演示。
例如,这里我们指定每 5 秒前进一次,并继续循环:
---
title: "演示"
format:
  revealjs:
    auto-slide: 5000
    loop: true
---
自动滑动控制元素将自动出现在自动滑动的幻灯片中。如果用户开始与幻灯片交互,滑动会自动暂停。也可以通过按下键盘上的 A 来暂停或恢复滑动。
你可以通过指定 auto-slide-stoppable: false 来禁用自动滑动控制,并防止滑动被暂停。
幻灯片计时
还可以通过使用 autoslide 属性为单个幻灯片和片段覆盖幻灯片持续时间(此属性也适用于片段)。例如,这里我们将自动滑动值设置为 2 秒:
## 幻灯片标题 {autoslide=2000}发布
发布 Reveal 演示文稿主要有两种方式:
作为 PDF 文件——参见上面的[打印为 PDF]以了解如何操作。
作为 HTML 文件。对于 HTML,通常最方便的是将演示文稿分发为单个自包含的文件。为此,请指定
embed-resources选项:--- title: "演示" format: revealjs: embed-resources: true ---所有依赖的图像、CSS 样式和其他资源都将包含在 Quarto 创建的 HTML 文件中。
::: {.callout-note appearance=“simple”} 请注意,指定
embed-resources可能会使渲染速度减慢几秒钟,因此你可能希望仅在准备发布时启用embed-resources。还要注意,Reveal 插件[Chalkboard]与embed-resources不兼容——当启用[Chalkboard]插件时,指定embed-resources: true将导致错误。 :::
有关发布 Reveal 演示文稿的其他方式(包括 GitHub Pages 和 Posit Connect)的详细信息,请参阅发布 HTML的文档。
导航选项
Reveal 演示文稿提供了几个导航提示和相应的控制它们的选项:
| 选项 | 描述 |
|---|---|
controls |
显示用于导航幻灯片的箭头控制(默认为 auto,当存在垂直幻灯片或幻灯片嵌入在 iframe 中时将显示控制)。 |
progress |
在底部显示进度条(默认为 true)。 |
history |
将幻灯片的变化推送到浏览器历史记录中。默认为 true,这意味着可以使用浏览器的前进/后退按钮进行幻灯片导航。 |
hash-type |
用于幻灯片的 URL 哈希类型。默认为 title,该类型从幻灯片标题派生。您也可以指定 number。 |
例如,以下配置隐藏了进度条,并指定我们希望使用浏览器历史记录:
---
title: "演示文稿"
format:
  revealjs:
    progress: false
    history: true
---
黑板
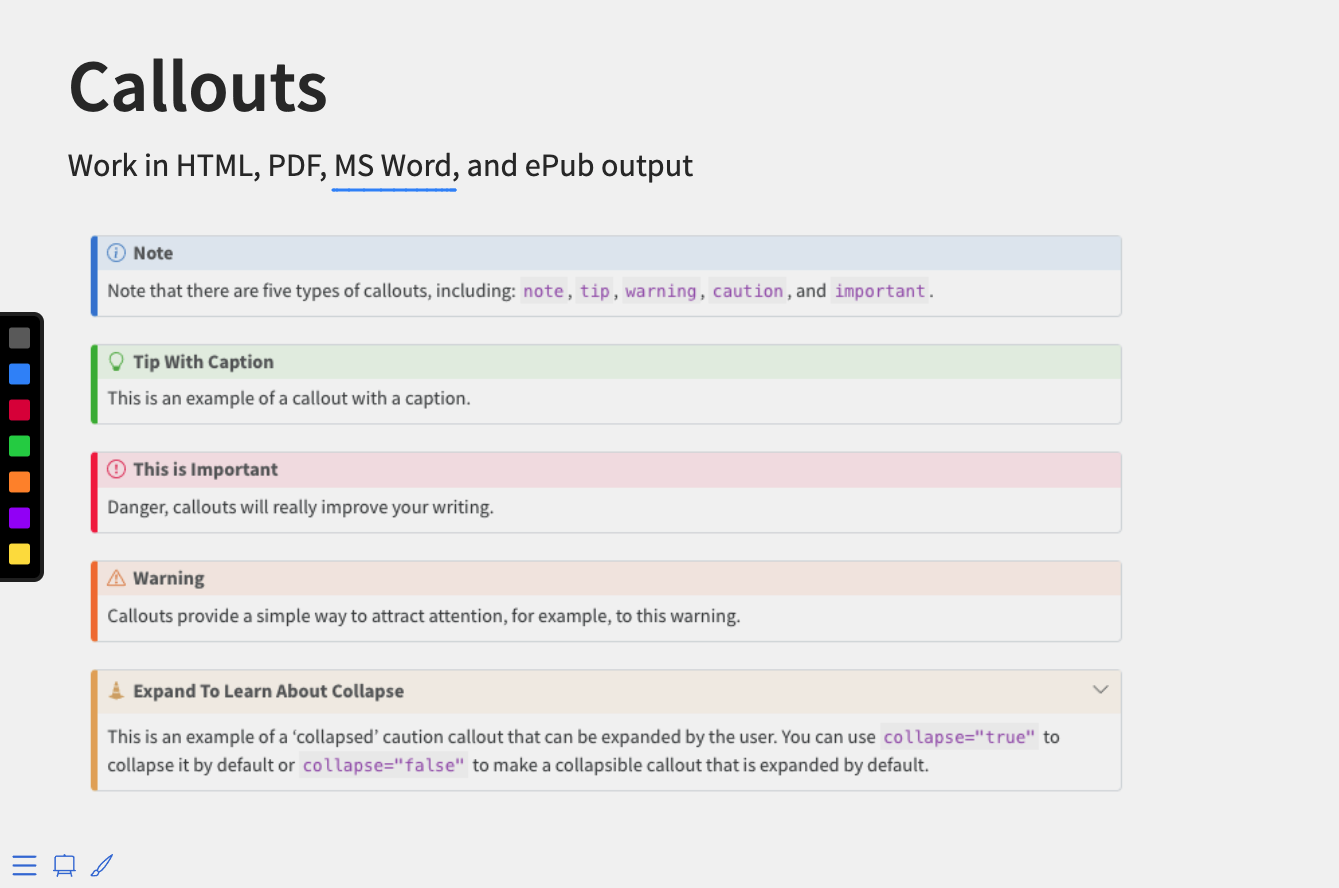
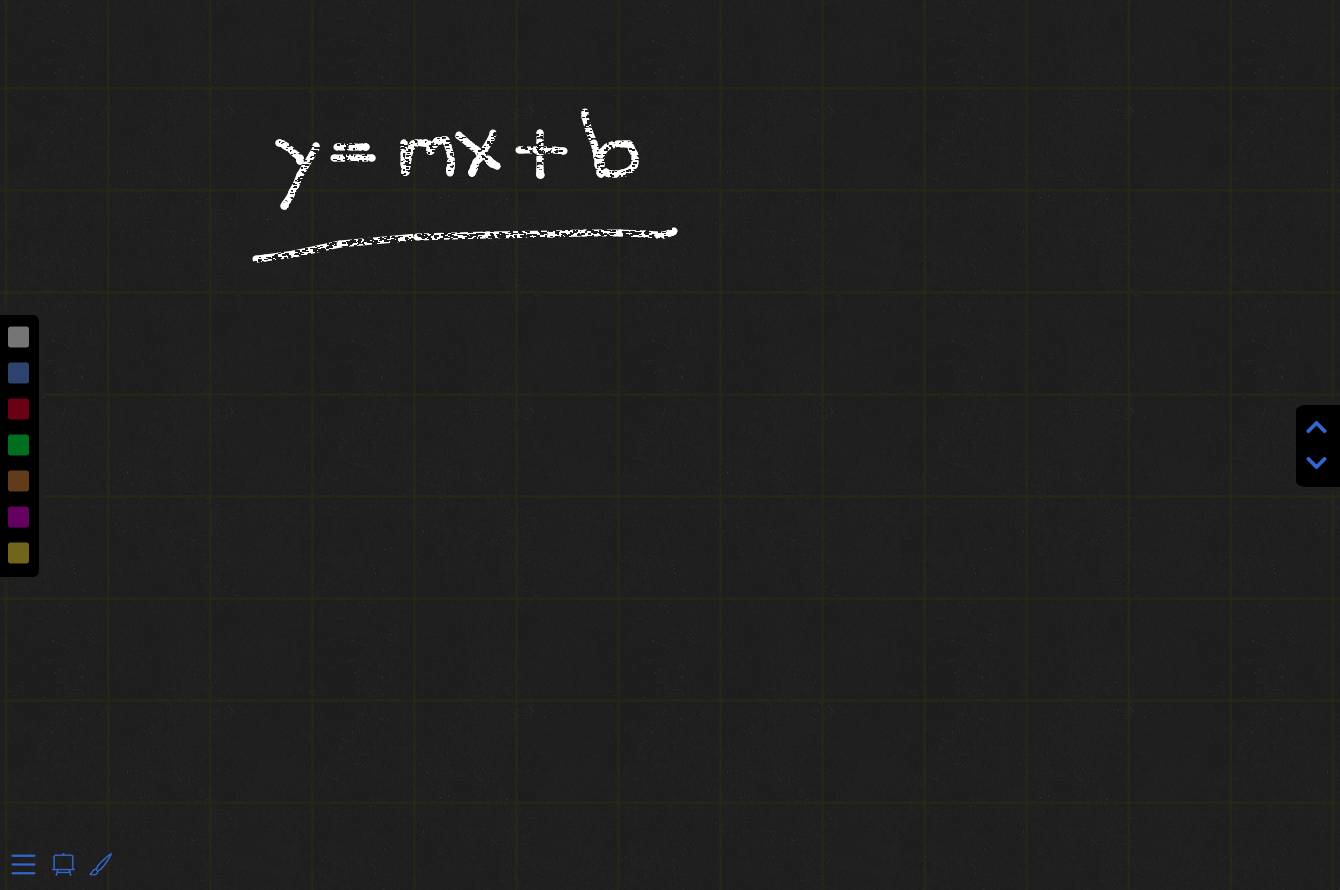
Quarto 包含内置版本的 reveal.js-chalkboard 插件。指定 chalkboard: true 选项以启用该插件,该插件使您能够在幻灯片上方的笔记画布上绘图,或在演示文稿中打开一块空白的黑板:
---
title: "演示文稿"
format:
  revealjs:
    chalkboard: true
---
注意,Reveal 插件 [Chalkboard] 与 embed-resources 输出不兼容 — 当启用 [Chalkboard] 插件时,指定 embed-resources: true 会导致错误。
以下是激活笔记画布和黑板时的样子:
要切换笔记画布的开关,请使用 ![]() 按钮或 C 键。
按钮或 C 键。
要切换黑板的开关,请使用 ![]() 按钮或 B 键。
按钮或 B 键。
以下是与笔记画布和黑板相关的所有键盘快捷键:
| 操作 | 键 |
|---|---|
| 切换笔记画布 | C |
| 切换黑板 | B |
| 重置所有绘图 | BACKSPACE |
| 清除幻灯片上的绘图 | DEL |
| 向前循环颜色 | X |
| 向后循环颜色 | Y |
| 下载绘图 | D |
以下鼠标和触摸手势可用于与绘图交互:
点击左下角的按钮以切换笔记画布或黑板
点击左侧 |
chalk-effect| A float in the range[0.0, 1.0], the intensity of the chalk effect on the chalk board. Full effect (default)1.0, no effect0.0. | |src| Optional file name for pre-recorded drawings (download drawings using the D key). | |read-only| Configuration option to prevent changes to existing drawings.true: no changes can be made,false(default): changes can be made. | |buttons| Add chalkboard buttons at the bottom of the slide (defaults totrue). | |transition| Gives the duration (in milliseconds) of the transition for a slide change, so that the notes canvas is drawn after the transition is completed. |
For example, the following configuration specifies that we want to use the whiteboard theme with a (thicker) boardmarker width, and that we want to hide the chalkboard buttons at the bottom of each slide:
---
title: "Presentation"
format:
  revealjs:
    chalkboard:
      theme: whiteboard
      boardmarker-width: 5
      buttons: false
---
If you disable the chalkboard buttons globally you can selectively re-enable them for individual slides with the chalkboard-buttons attribute. For example:
## Slide Title {chalkboard-buttons="true"}You can also use chalkboard-buttons="false" to turn off the buttons for individual slides.
Multiplex
Quarto includes a built-in version of the Reveal Multiplex plugin. The multiplex plugin allows your audience to follow the slides of the presentation you are controlling on their own phone, tablet or laptop. When you change slides in your master presentations everyone will follow and see the same content on their own device.
Creating a Reveal presentation that supports multiplex is straightforward. Just specify the multiplex: true option as follows:
---
title: "Presentation"
format:
  revealjs:
    multiplex: true
---
Rendering the presentation will result in two HTML files being created by Quarto:
| File | Description |
|---|---|
presentation.html |
This is the file you should publish online and that your audience should view. |
presentation-speaker.html |
This is the file that you should present from . This file can remain on your computer and does not need to be published elsewhere. |
The two versions of the presentation will be synchronized such that when the speaker version switches slides the viewers also all switch to the same slide.
Multiplex Server
Behind the scenes there is a multiplex server that is synchronizing slide events between the viewer and speaker versions of the presentation. Note that the this server does not actually see any of the slide content, it is only used to synchronize events.
By default, a server created and hosted by the Revealjs team is used for this: https://reveal-multiplex.glitch.me/. This server is used by default when you specify multiplex: true.
Running your own server
If you want to run your own version of this server its source code is here: https://github.com/reveal/multiplex/blob/master/index.js.
You can then configure multiplex to use an alternate server as follows:
---
title: "Presentation"
format:
  revealjs:
    multiplex:
      url: 'https://myserver.example.com/
---
Note that Quarto calls the multiplex server behind the scenes to provision a id and secret for your presentation. If you want to provision your own id and secret you can do so at https://reveal-multiplex.glitch.me/ (or using your custom hosted server URL) and provide them explicitly in YAML:
---
title: "Presentation"
format:
  revealjs:
    multiplex:
      id: '1ea875674b17ca76'
      secret: '13652805320794272084'
---
Note that the secret value will be included in only the speaker version of the presentation.
Learning More
See these articles lo learn more about using Reveal:
- Reveal Basics covers the basic mechanics of creating presentations.
- Advanced Reveal delves into transitions, animations, advanced layout and positioning, and other options available for customizing presentations.
- Reveal Themes talks about using and customizing existing themes as well as creating brand new themes.